Whether you’re planning to use your pool through the winter or not, here’s what you need to know and do to prep your pool for the cooler winter months ahead.
Traditionally, the cooler weather triggers the need to clean out and wrap up a home pool for shut down over winter. Thanks to our beautiful Mid North Coast climate along with modern-day heating technology, many home pool owners have the luxury of an all-year-round pool. That doesn’t mean you don’t need to prep your pool for winter, though! Even if you’re planning to enjoy your pool through the winter, it’s likely you’ll use it a little less and therefore pool care looks a little different than in summer. And, if you’re not planning a dip or two through the chilly season, it’s important to know that just switching off the pump and throwing the cover over is likely to bring you a bunch of unwanted surprises…and costs…come spring!
So, here are a few key steps you need to take in order to properly prep your pool for winter.
1. Clean your pool
Ok, so this is a little obvious, but worth stating… just in case. It’s good to get into the habit of using each seasonal change as a trigger for a good, detailed pool clean. And, we’re talking a deep clean, not just a “scoop the leaves out and we’re done” effort. Option 1 – outsource the job to a professional pool cleaner, then sit back and watch your pool sparkle once more. Option 2 – a good ol’ DIY. Give the walls and floor a good brush, remove any debris from the pool itself as well as the skimmer basket and pump, backwash your filter, and ensure you’ve cleared the surrounds for any loose items that might find their way into the water.
2. Test and adjust the pool PH
An unbalanced pool can cause serious corrosion, start the development of algae, and also throw your equipment into expensive repair mode. A water balance is a must. Your pool’s PH levels should ideally remain between 7.4 – 7.6. You can test it yourself using a PH kit, but remember to scoop at least elbow deep to ensure you’re not just capturing an accurate water sample. Not sure what to do if your pool is out of whack? Give us a call and we’ll get you on track with how to dose or shock accordingly.
3. Add a winterising chemical kit
Winterise. Yes, it’s a real word! A winterising chemical kit will help improve the clarity of your water and protect against algae build-up by removing phosphates (algae’s favourite food). While you can buy chemicals separately, a winterising pack will usually cover all you need while also providing instructions so you can DIY without concern. Most winteriser packs will include algaecide, phosphate remover, and a natural clarifier. Be sure to read (and follow!) the instructions carefully, and always store chemicals out of reach of small hands and fury friend mouths.
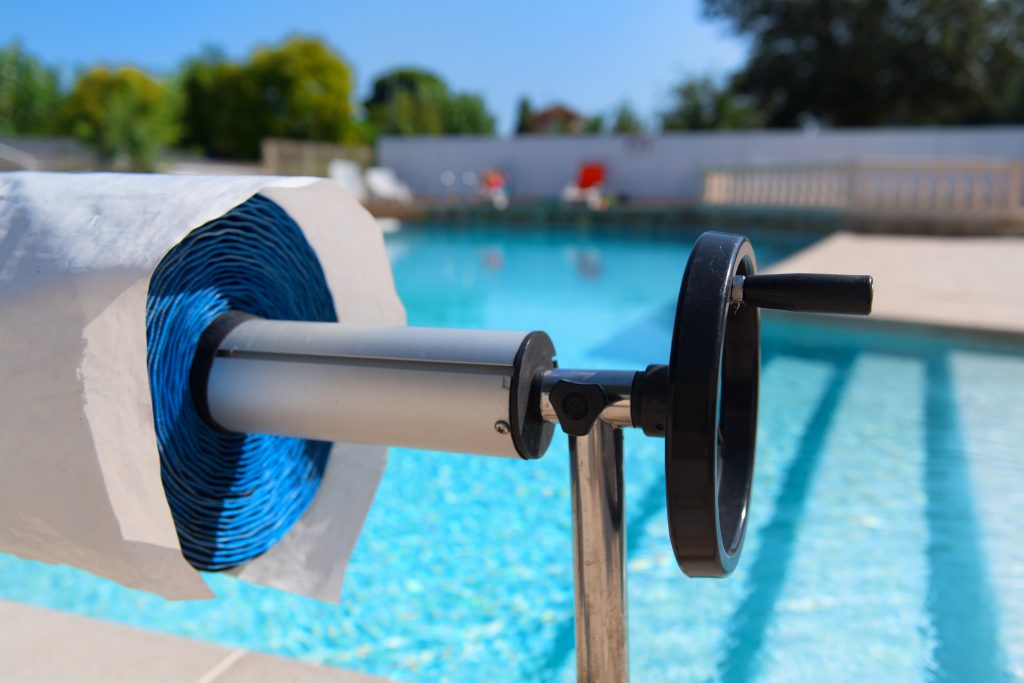
4. Throw on the pool cover
Want to ensure you don’t undo all that hard work you’ve done in steps 1-3? It’s time to throw on your pool cover. Don’t have one yet? Now’s the perfect time to invest. A pool cover will not only protect all you’ve done to prep your pool for winter, but also minimise the maintenance needed throughout the cooler months, too.
5. Continue with simple maintenance
While we’d love to say otherwise, it’s unfortunately not quite as simple as set and forget. If you truly want to avoid a time consuming and potentially costly spring prep, it’s worth keeping to a simple maintenance routine. And when we say simple, we mean it. A quick water chemistry and filter gauge check every couple of weeks should do the trick. If you want to go the extra step, you may like to have your water tested by a professional mid-season to ensure all is as it seems.
And there you have it.
A little effort to prep your pool now means a lot of effort saved when it comes time to roll that cover back and jump back in! Don’t forget to check back here in August for our top tips in reverse – how to get your pool ready for spring!